
Dave Hauth and I are engaged in a playing of RBCGI: Into the Factory. I'm the Reds. He's the Jerries.
We're each maintaining a blog correspondence as the game progresses. We've a Gentleman's Agreement that neither of us will read his opponent's blog until given express permission to do so.
Readers are encouraged to comment! Speak your piece! Just be sure not to inadvertently reveal any information about Dave's plan to me or vice-versa.
You can read Part I of my account here.
You can read Dave's blog here.
Aftermath of CG Day 1
Ouch! These Germans mean business...
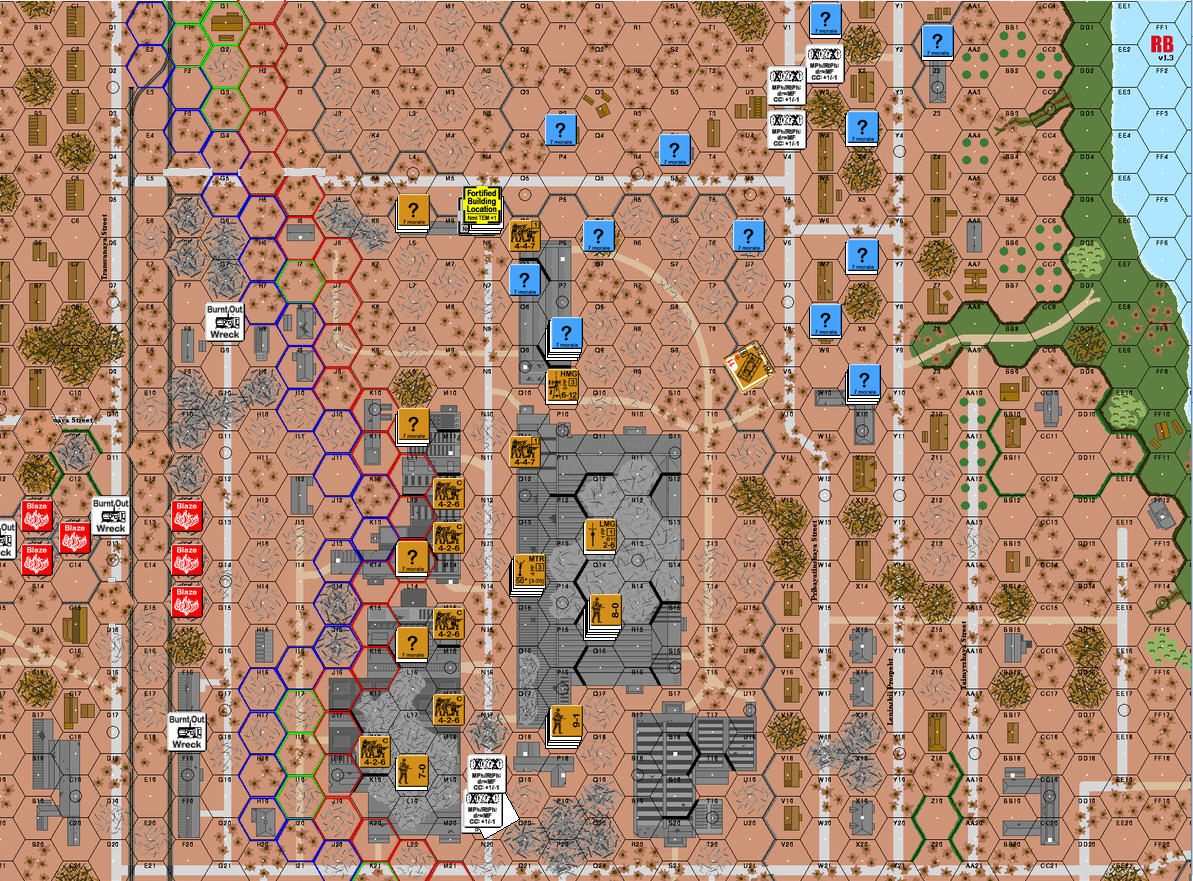
Here's how the perimeter looked at the end of CG Day 1.
 |
Perimeter at end of CG Day 1 |
My ATG claimed a Panzer, and my platoon of infantry in the B12 building slowed him down, but when my KV was destroyed by a Stuka, my forces were overwhelmed. By the end of Turn 3, it was off to the races for the Germans. The game lasted seven (eternal) turns, at the end of which Dave took control of the Power Station, completely unopposed.
In the north, my barrage of Katy didn't do much of anything, but my rifle company in the north held their ground. My troops by the riverbank made a break for the west and, in spite of the Stukas managed to get in front of the Germans on the last 2 turns of the game, preventing him from penetrating deeply into the factories.
The Germans suffered 35 CVP; the Russians suffered 42 CVP. I killed four of his tanks, which kept the CVP totals close, but my infantry was decimated and I now find myself with half the number of squads as the Germans!
Well, after all, I knew that my Day 1 gamble (buying a Katy module rather than an infantry company) might blow up in my face. It certainly has. I've dug myself quite a hole. Let's see if I can get out of it.
Day 2: Bend, don't break
My forces are reeling. The best thing to do, I believe, is to give ground. Set my stand-and-fight line well back from the perimeter and fall back to it. I want to start the day with a buffer between my troops and the Germans. Make him come to me; nick him once or twice on the way in.
I don't need to kill Germans as much as preserve my own forces. That is because the pressure never lets up for the German player. He is compelled to take ground and destroy Russians at a frantic pace. Numerically, his forces can't keep up. I plan to purchase all 3 of my allowed infantry companies for the day. So, as successful as he was on Day 1, Dave can't afford to let up.
 |
Dave sees this... |
- 628 x 2
- 447 x 11
- 527
- 426
- 228
- 9-1 x 2, 9-0, 8-0, 7-0 x 2
- HMG x 2, MMG, LMG x 3, Lt. Mtr.
- 45LL ATG
- KVII M42 dug-in U9
 |
| Day 2 setup |
I'm allotted 17 CPP for the day. These are my purchases:
- A1 T60 Pltn Dug In 2 CPP
T60 x 3
- I3 Rifle Coy (reserve) 4 CPP
447 x 12
HMG, MMG, LMG, Lt. Mtr, Atr
9-1, 7-0
- I4 SMG Coy (reserve) (depleted) 3 CPP
527 x 7
10-0
- I5 Militia Coy 4 CPP
426 x 12
MMG, LMG, Lt. Mtr, Atr
9-0
- M1 120 Fortification points 3 CPP
Wire x 4
12 factors AP mines
HIP 2 squads
? x 18
- O2 80mm Btln Mortar (scarce ammo) 1 CPP
 |
Day 2 setup in the north |
It is possible that Dave may choose this day to drive to the river. If he does, well c'est un fait accompli. There is little I can do beyond what I've done, which is to deploy my depleted reserve SMG company to serve as speed bumps to any determined German push. Frankly, it won't hurt my feelings one bit if Dave does attack here. He will establish himself on the river (an unhappy fact), but at least he won't kill too many of my troops. I simply don't have that many over there for him to kill.
Basically, I'm abandoning factories J13 and J17 to the Germans, with only a couple platoons of unfortunate conscripts to stand in the way. I'll give ground here faster than you can say "Heinrich, geben Sie mir jene Handgranate!" I regret giving up building K10 without a fight, but there's nothing to be done for it. I'll give up the buildings in the north against any serious German pressure, too. That ground is German for the taking and I suspect Dave knows it.
My plan is to make my stand in the big O10 factory. That's why I have an HMG, squad and leader in N5; to interdict Germans jumping off from the J13 factory. I've deployed my active rifle company here. The northernmost of my T60s is placed in N19, between the two factories, protected by wire and mines. If it is in any way possible, I want to hold building O18. If Dave wants a big fight, this is where he'll get it.
 |
Day 2 setup in the south |
Here, too, I'm prepared to abandon everything west of hex row N. I'm drawing my line east of that. My 2 southern T60s are set up to help me make a stand for the P21 factory, which is where I've deployed my reserve rifle company. I've set up two platoons of conscripts in the K27 factory, hoping to draw the Germans that way rather than see them charge eastward.
Over on the west edge of the map, in the area around Building F32, I've got more than meets the eye. I've got 2 of my battle-hardened SMG squads hidden there, along with a mortar wielding 527 and my surviving 45LL ATG. Lastly, I've got a hidden leader there, manning a field phone that will direct my 80mm mortar. I'm hoping to use the mortar to smoke in any nasty German machine gun stacks. Or, if the Germans enter the debris field, to drop HE on them. I think this is a good position for my AT gun. It could catch reinforcing German tanks as they drive toward the fight that is sure to develop along the N hex row or in the K27 factory. My hidden machine-gunners have a good chance of ambushing German units that are looking to extend the perimeter southward.
After the whipping I took on Day 1, I'm feeling a little desperate. But, if the Russian doesn't feel desperate on Day 2, the German has already lost.
We're scheduled to play again in about 2 weeks. We'll see how it goes...
To be continued...
No comments:
Post a Comment